Assemble a local dev environment – not only for OXID eShop 6 – in a vagrant box
A while ago, OXID officially announced the availability of a unified development environment OXID Developer VM, based on Ansible and Vagrant.
To be honest, I quarreled with it a long time and put hours and hours to understand the concept behind (by trial and error). Finally, I made it with some help of my dear friends and colleagues to get the basic principles and to have it up and running a way I want to use it. I’d like to share this knowledge with you in this blog post.
At certain phases before, I was using either a LAMP/WAMP stack or a predefined virtual machine on my computer for a localhost as a “development” system (I don’t “develop”, so it is more likely some environment for looking something up, checking translations, helping out in the forums, whatsoever…). Anyway, these systems have some disadvantages like always running as services in the background, distracting the performance of your desktop machine or have to be configured a way that they fit your personal needs 100%. Once you mis-configured anything in these local services, you’d have to start over again, and often, in your everyday workload, you wouldn’t take your time for that, right?
With these Vagrant boxes like oxVM, it is a completely different behaviour:
- Keep your local virtual machines as lean and lank as you want to have them. Install only the necessary stuff. Make your web-hosting provider responsible for letting the application (and many others) running on their productive environment.
- One virtual machine for one project. If you’re working on another project, maybe other requirements have to be set. You can run different virtual machines the same time (of course, in dependence of your hardware setup).
- At least oxVM presets a shared folder which is accessible read-writing for your IDE. Try this with any *AMP or VM, and I’ll promise: you’d google your arse off for a proper solution 😉
- If you messed something up with your localhost environment, simply vagrant destroy and vagrant up again.
- Most of the necessary configurations can (thanks to Ansible) be set in a personal.yml file. Vagrant up is using this one file, and you’ll be in the game again within minutes (depending on your Internet connection of course).
- Assemble a virtual machine of your choosing: no matter if you want to run Virtualbox, LXC (Linux only), VMWare or Parallels (Mac).
- oxVM will always guarantee that it is made for OXID eShop development, no matter if you just want to set up a simple shop or you want to create modules (functional enhancements) for it.
With other words: it is possible to have a working local environment which is robust and flexible enough to meet your needs within a short time. However, you definitely ought to check it out yourself to get a feeling for it. Let’s have a hand on it now.
I personally had the specific need that I wanted to work with different concurrent applications on the same VM, using the local/shared folder ~/public in my case: several OXID eShop installations, different versions/editions, a local WordPress dev environment for OXIDforge.org, Contao and some of the competing products of course – sort of that kind. I also want to install OXID Module Connector which requires php5.6-zip as a PHP extension.
Prerequisites
While writing this blog post, I am setting up this OXID Vagrant box on a Linux machine but this tutorial shall work on other operating systems as well. First, we have to install some software that is necessary to properly run this VM. This is described as Dependencies in the oxVM README file.
Download and customize oxVM
Download oxVM from its GitHub repository:
git clone --recursive https://github.com/OXID-eSales/oxvm_eshop.git
Now, before the first vagrant up command, we can already start configuring our setup. From the file oxvm_eshop/ansible/vars/oxideshop.yml I copied several sections into oxvm_eshop/personal.yml.
It looks like this now:
---
vagrant_local:
  vm:
    name: oxvm_box
    hostname: projects.dev
    aliases:
      - www.projects.dev
    app_shared_folder:
      source: /home/marco/public
      target: /var/www
eshop_target_path: "{{ vagrant_local.vm.app_shared_folder.target }}/oxideshop_ce"
apache:
  docroot: /var/www
php:
  install: true
  packages:
    - php5.6-cli
    - php5.6-intl
    - php5.6-mcrypt
    - php5.6-mysql
    - php5.6-gd
    - php5.6-curl
    - php5.6-xml
    - php5.6-zip
The name of my virtual machine is oxvm_box. As a host name, I chose projects.dev. Although oxVM tries to enter it into your host file during the first vagrant up procedure, I would check if it was really placed there (location of this file depends on your operating system).
The shared folder in my host system (my local machine) is /home/marco/public, and it shall point to /var/www on the guest system (oxVM). This is also the docroot of the apache server in oxVM.
As you can see, at the value of eshop_target_path, I added a trailing /oxideshop_ce. This way, OXID eShop 6 (master branch) will be added into home/marco/public/oxideshop_ce during the vagrant provisioning process, and you’ll be able to add for example your existing OXID project on an older version or another CMS that shall belong to your project on the same directory level, e.g. home/marco/public/wordpress.
As I said above, I want to use OXID Module Connector in my project which requires php5.6-zip on the server. In the example above you can see how I added it to my personal.yml file.
If you want to change this behaviour later, simply run
vagrant reload
to make them take effect.
Using your own project repository
Maybe you want to checkout your own existing OXID project from GitHub. In this case it is possible to copy the following lines from oxideshop.yml, adapt them accordingly and store them in your personal.yml:
eshop:
  source:
    repo: https://github.com/Your-Organization/your_project.git
    version: master
If it is about an older OXID eShop version you might have to adapt other system requirements as well: for a quick smoke test, I got adoDB-Errors in my installation. Mayhap, you need to vagrant destroy and vagrant up again if you already provisioned your system before.
You get the idea now, don’t you?
Vagrant up!
The configuration of your system is now finished, let’s start the provisioning process now. Move into your oxvm_eshop folder and type the following command:
vagrant up
This will now
- install Ubuntu 14.04 by default as a guest system,
- add an entry into your hosts file,
- install a LAMP (Linux/Apache/MySQL/PHP) system on your guest,
- adapt it to your personal needs you addressed in your personal.yml,
- connect the folder /var/www (guest) with your defined shared folder on host,
- install OXID eShop,
- start VirtualBox and runs the guest system on it.
Take a look at the public folder of your host system: there shall be a new folder oxideshop_ce in it.
The final steps
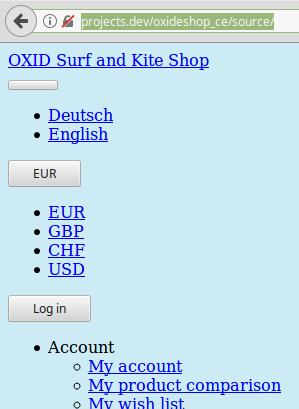 You shall now be able to access http://projects.dev/oxideshop_ce/source/ in your browser. But wait, what’s that? Apparently the CSS is not loaded or rather loaded from a wrong path. Unfortunately, I couldn’t find a way to configure this via the yml files. Apparently we have to fix it manually:
Replace in public/oxideshop_ce/source/config.inc.php
$this->sShopURL = 'http://projects.dev'; // eShop base url, required
with
$this->sShopURL = 'http://projects.dev/oxideshop_ce/source'; // eShop base url, required
To ensure that the rewriting of the URLs will work properly, in public/oxideshop_ce/source/.htaccess replace
RewriteBase /
with
RewriteBase /oxideshop_ce/source
You’re all done now, congratulations! As you can see, adjusting oxVM for your own needs is pretty easy doable. Aside OXID eShop you can now run other applications that have similar system requirements which is very practical if you have to connect for example WordPress with OXID in your project. Above, I illustrated just an example of how to alter the behaviour of your oxVM vagrant box, OXID will not officially support it this way. I certainly urge you to think of the better option – using one VM for just one project!
Have fun with your new vagrant box!
[…] take a look at Marco’s Blogpost about assembling a local dev environment with oxVM vagrant box. Depending on your operating system as host, you might want to choose different ways to […]
[…] why I always suggest to use a development environment just for development purposes on your local machine where you can run composer without any risk and upload the results of your work to your productive […]
[…] strongly advise to use a local development environment for running your OXID eShop project. Most likely, at some point, you want to transfer it to your […]
[…] why I always suggest to use a development environment just for development purposes on your local machine where you can run composer without any risk and upload the results of your work to your productive […]