Working with a child theme in OXID eShop – using language names instead of flags
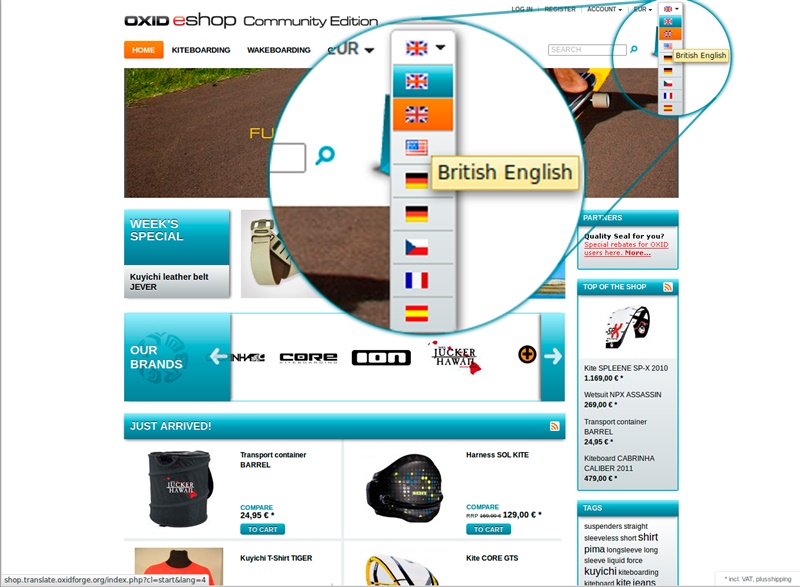 The default Azure theme, shipped with OXID eShop, uses flags instead of language names for the language changer. This makes sense when working with just two languages in your installation like English and German but quickly gets confusing when more languages are provided. In this case you most likely want to have the names of the language displayed instead of the flags.
Of course you could make the changes directly within the Azure theme but with the next update, your changes could be overwritten. Instead, it is recommended to work with a so called “child theme” in order to keep the updatability of your system. If the files you adapted will be changed with the update, you can simply make a diff on them and tighten the modernized code in your file.
Alright, let’s get hands on then. Let’s sort out how to find the appropriate place to change in the template jungle in this first step. In the shop root directory, you shall find a file called config.inc.php. Open this file and find $this->iDebug = 0. Replace the value “0” with “8” and clean up your tmp/ folder, then open the front end of your shop again. You’ll see the names and paths of the used templates and widgets now. The file we have to edit can be found here: application/views/azure/tpl/widget/header/languages.tpl.
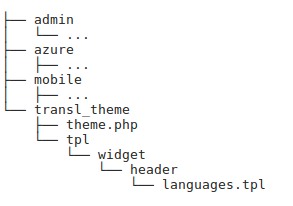 As we said, we want to work with a child theme. To achieve this goal, we have to make a new directory in /application/views/. I will call it transl_theme in this example. Now copy the file languages.tpl into this new made directory, keeping the entire folder structure: application/views/transl_theme/tpl/widget/header/languages.tpl. Additionally, copy application/views/azure/theme.php into application/views/transl_theme/theme.php. The new structure shall look like shown in the picture besides.
Now we have to adjust the file theme.php first. Open this file and make the necessary changes. In my simple example nothing special is needed but make sure you care about the following options:
$aTheme = array(

'id' => 'transl_theme',

.

.

.

//Define the following variables for the custom child themes:

'parentTheme' => 'azure',

'parentVersions' => array('1.4.0'),

);
Please note: ‘id’ has to be the same as the folder name for your child theme. The option ‘parentVersions’ shall refer to the version of the Azure theme that you want to use.
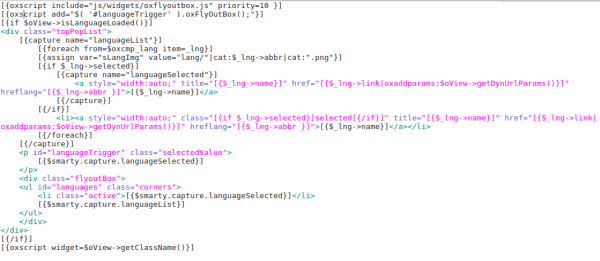
Now it is time to care about the actual changes we want to do. Open the file languages.tpl and make the necessary adaptions. In my example, the new code (thanks to @vanilla_thunder for the help with it) looks like this:
Do not forget to clear the tmp/ folder after your changes.
BTW, this can be done using $ rm -r * at she shell from within this folder, via FTP (usually very slow) or even from the GUI with one of the free modules, for example ocb_cleartmp.
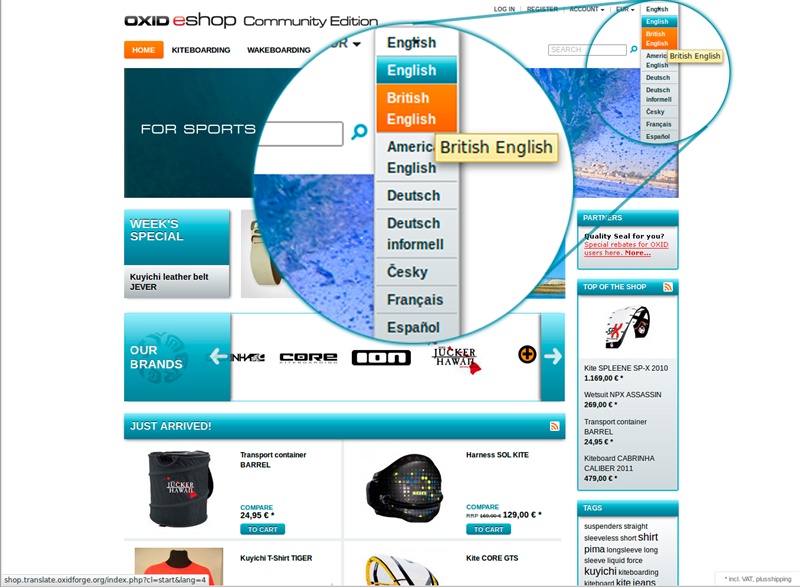 You’re already done with this task, congratulations! Your shop shall now look like in the picture besides and show the language names instead of the flags.
Please remember that you can use your new child theme for every change in the templates that you would have to do. Only by strictly following this modus operandi you can ensure that your installation will work properly and withstand software updates.